Objectives:
Deploy an application with a custom environment to Google Cloud
Prerequisites:
Folk and clone this repo: https://github.com/hangnhat57/compute-engine-101/
Open Terminal and cd to the folder you’ve just cloned
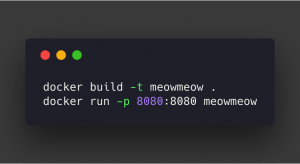
First, let’s try to run the app on a local machine to verify it has worked:
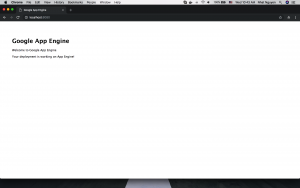
Open your browser and navigate to http://localhost:8080, you’ll see something like this:
This application is serving inside a container which was customized from scratch:
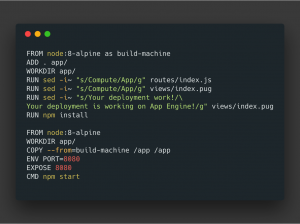
To deploy a custom container to App Engine, we have to use Google App Engine Flex – Custom Environment. By default, App Engine will serve container application in port 8080, so remember when you create an image.
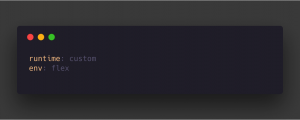
App.yaml file will look like this :
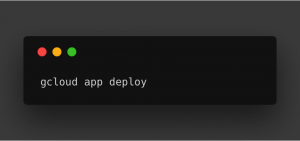
Now, on the terminal, start a command:
If this is the first time you using App Engine for the current project, Google will ask you for the region of App Engine service:
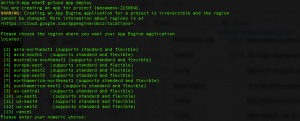
Select the region you want and wait until it finishes. Then use this command to view your app on the public:
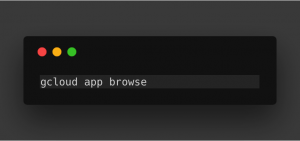
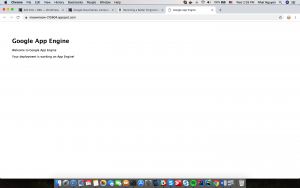
A browser would automatically open and navigate to your app:
Have you read the previous post of the Google Cloud Series? Make sure you check it right now
Comment below or email us via contact@twentyci.asia if you have any question or want to have free consultation!
Nhat Nguyen
Objectives:
Deploy a highly scalable Nodejs app on GCE
Prerequisites:
1.Folk and clone this repo: https://github.com/hangnhat57/compute-engine-101/
2. Create a service account which has Roles: Compute Instance Admin (v1) and Source Repo Writer

Create a service account
Deployment Strategy:
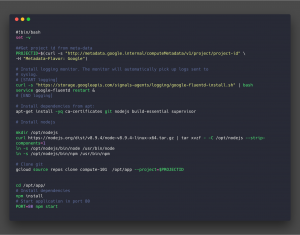
1.Create a startup script which will automatically get the code, install dependencies then start web server right after instances start
2.Create an instance template with a startup script
3.Create an instance managed group and enable autoscaling
4.Create a load balancing to route traffic between instances of group
Actions:
1. Open Google Web Console, then go to Source Repositories.
2. Enable API for the project, this could take a while
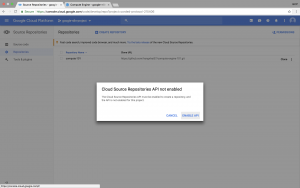
Enable Source API for the project
3. Create a repository in CSR. It will give you 3 options how you save your code. For me, I mirror this repository with my GitHub project.
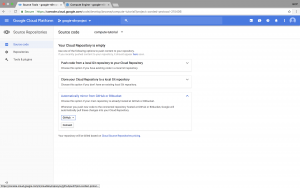
Select connect to Github and select project for mirroring
Hold on! Why do we have to mirror Github repo to Google? Why don’t we directly use Github?
In case your repository is private, when an instance starts, it would require your credential to get the code from repo. Because we use startup start, cloning source code to instance must be automatic without any human interaction. This means you’ll have to store your ssh key or user/password in instance metadata/environment variable, therefore it’s not the most effective way. So we mirror to GSR then grant access permission for a service account which will be assigned to instance template.
4. On your local machine, open terminal then cd to project folder that you’ve cloned.
5.Open startup.sh file, change <repo name> to your google repository name then save it.
6. Open create-ins-template.sh, change <project-id> to your project id. <service-account-name> to the service account that you’ve created in prerequisites step. Then execute it.
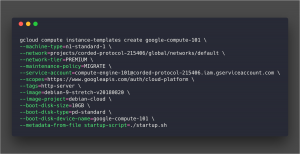
You can go to web console -> Compute Engine -> Instance templates section to create manually by Web UI also.

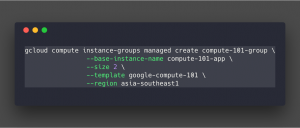
7. Next, we create a managed instances group. Open create-ins-group.sh and execute first script block.
Then active auto-scaling for that group
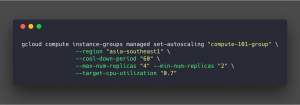
Now we have an instance group that has the minimum of 2 instances in the region, will add or remove VMs to group if CPU usage reaches 70%. Maximum instances number is 4.
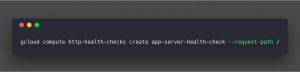
8.Execute the script in create-health-check.sh to create an HTTP health check for Load Balancer
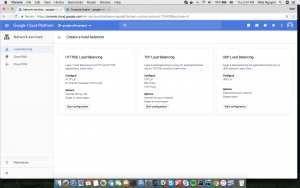
9. Now on Web Console, go to Network services > Load balancing and click on Create load balancer. Select Config HTTP(s) load balancer.
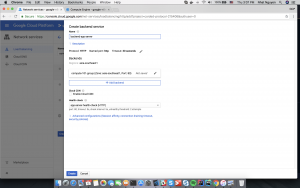
10. Create a new backend service with the instance group and health check we’ve just created.
Leave Host and Path rules, Frontend config by default, then Create the Load Balancer
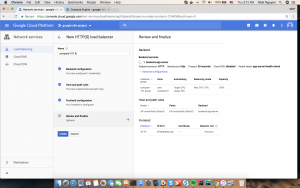
The load balancer would take a moment to set things up, then you can access your web app through load balancer external ip
And that’s it. You’ve deployed successfully a web server which always ready to scale up when needed. Autoscaler is turned on in the Instance Group governing the two instances. If there is an increase in usage (CPU in our example), the Autoscaler will spawn a new instance to handle the increase in traffic.
Have you read the previous post of the Google Cloud Series? Make sure you check it right here
Please share & subscribe if you find this helpful! Also feel free to ask any question by commenting below or sending an email to contact@twentyci.asia
Nhat Nguyen
Nowadays, Cloud Computing is an important part of the Internet world. I remember when Apple introduced their iCloud, I thought it was funny, there would be no one want their data, especially sensitive personal data on the internet. Ironically, now most of my important files are on iCloud 😀
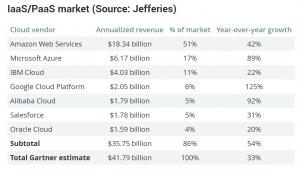
So Cloud Computing’s simply known as “the delivery of computing services—servers, storage, databases, networking, software, analytics and more—over the Internet” – regarding its definition. Companies offering these computing services are called cloud providers. You may know Amazon Web Service – the big guy, huh? Microsoft Azure and Google Cloud too, of course. In this series, I will give you some practices with Google Cloud Platform (GCP). Hope it will be helpful to you all, even just a little bit.
Google is a newbie in the Cloud provider market, but they are growing dramatically fast. On December 20th, 2017 Jefferies analyst John DiFucci introduced quarterly snapshots of public cloud services. Even though Amazon rules the public cloud, the year-over-year growth of 125% by Google Cloud Platform in 2017 is pretty incredible!
In this series, I will walk you through some popular resources of GCP that could help you understand more about them.
There will be 2 posts of the series
1.Introduction
2.In Action
But first, to follow this, you need to create a free trial account on GCP and install Google Cloud SDK on your device.
https://cloud.google.com/sdk/install
https://cloud.google.com/
After signing up for a new account and installing Google Cloud SDK, you should init your credential then create a separate project for practicing. So, let’s open your terminal and create it.
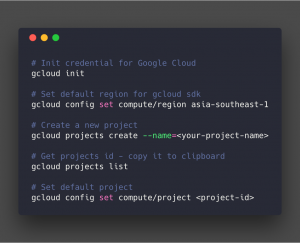
I will explain what the project is and how it benefits in another post. We have started with GCP by a few basic commands using the Google Cloud SDK command-line util.
Stay tuned for the next post! Leave a comment below or email us via contact@twentyci.asia if you have any question or want to have free consultation and please share & subscribe to our blog for more interesting posts.
Nhat Nguyen