Hi everyone, in the last post, we’d set up the project and config it
Today, we go to custom the autoloading effect forNuxt and make an alert notification center. We will use them very often after.
1. Autoloading effect
In many web application, when you click a link or submit a form… the loading icon will appear like a circle or a text like ‘loading…’
By default, Nuxt project has a very simple loading effect. It’s a line color on top of browser run from left to right. And it runs on every router changed or when we force perform it.
But now, I want to make my loading effect. In this case, I’d like it to be a circle with a transparent opacity background. We overwrite the default loading effect of Nuxt
We go to do it now.
First, you can search and make your favorite effect in HTML and CSS.
Then we create a component named “loading.vue” in components folder, its content is very simple, the template and script section just small like this:
 In the template section, it’s just a div tag with id and CSS class, we also add a v-if directive to control it show or hide in script section.
In the script, we declare a ‘show’ property and set up some method to control when it starts, when it finishes, when it fails… For more detail, please see in nuxt default loading component.
The last part of our loading file, we write styles for it:
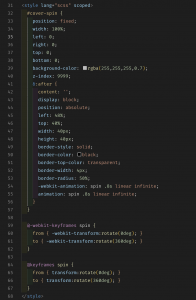 That’s all in loading.vue file
And now, the last thing we need to do: open nuxt.config.js file and find the ‘loading’ property. Replace it like below:
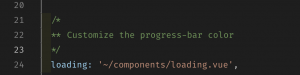
It means we use our custom loading component instead of the default.
Easy, right? See the result:
2. Make an alert notification center.
To do this, we use ‘vue-notification’ package
The detail in https://github.com/euvl/vue-notification, install it by running this command in Nuxt root folder (here is web-app):
“yarn add vue-notification”
After choosing the notification type you like, we will create our plugin step by step.
The first, create ‘vue-notifications.js’ in folder plugins:
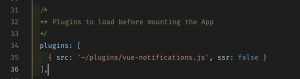
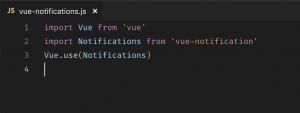 Then, we need to add that file into the ‘plugins‘ array property in nuxt.config.js
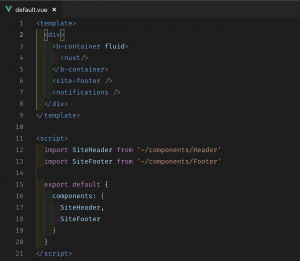
 The last step, we use the ‘ notifications’ directive in the default web layout, so we can use it everywhere:
Layouts/default.vue
 That’s all of the configurations.
Now we will test it.
Make a test page: pages/test.vue
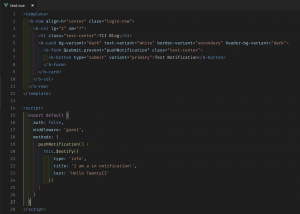 Simple is a button and when clicking on, it will trigger the push notification method.
In this method, we set some params: type is alert type (success, info, warning, danger…), title is notification title, and the text property is notification description.
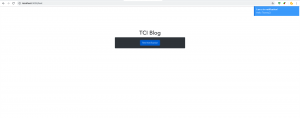
Run page, click the ‘Test Notification’ button and see the result:
 Thanks for reading, hope this series ‘s been helpful for you
In next post, we will make login using Nuxtauth and Laravel Passport. See you!