
When developing a website or specifically, an administration tool, tabular data display is pretty popular.
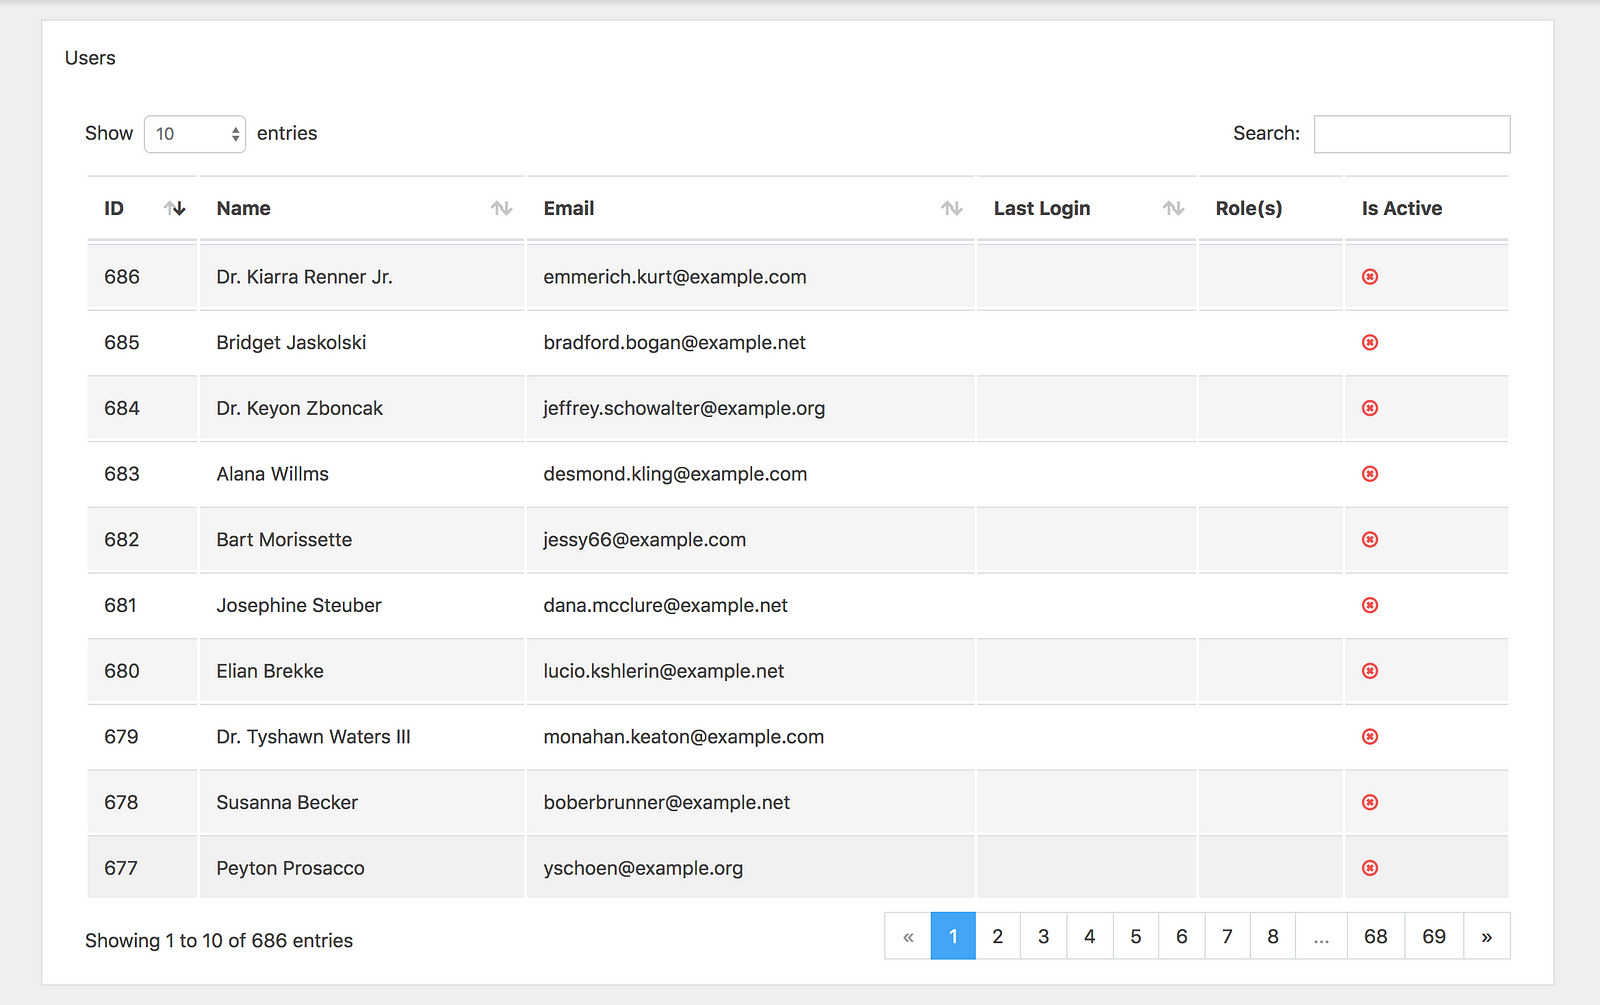
Before, pagination bar is used to be rendered in the back-end, but now, following the trend, I use React to develop a SPA (Single Page Application) administration tool, the pagination bar will be rendered in the front-end. As the pagination bar is used repeatedly and there is not any available package that is simple and easy to use, also one package is only for one component, so I have done some research and wrote a component to use in the entire project. It looks like this:

It could look complicated but discard all the css style, component Paginator will have these displays:
Prev 1 2 3 4 5 [6] 7 8 ... 68 69 Next
Prev 1 2 ... 4 5 6 [7] 8 9 10 ... 68 69 Next
Prev 1 2 ... 60 61 62 [63] 64 65 66 ... 68 69 Next
Prev 1 2 ... 61 62 63 [64] 65 66 67 68 69 Next
Create Prototype
As I keep looking into it, the component only requires input data, for example: currentPage, total (items), perPage (items) and handlePageChangedfunction to switch page and call request to update data when switching page.
To create prototype, I use create-react-app:
create-react-app demo-paginator
Top-down style, I assume there is the component,Paginator update App.js again to display with the test data:
import React, { Component } from 'react';
import Paginator from './Paginator';

class App extends Component {
    state = {
        currentPage: 1,
        total: 686,
        perPage: 10,
    };

    // Set current page to a new page and call request to refresh data
    handlePageChanged = (page) => {
        this.setState({
            currentPage: page,
        });

        // call request to refresh data
    };

    render() {
        const {
            currentPage, total, perPage,
        } = this.state;

        return (
            <Paginator
                currentPage={currentPage}
                total={total}
                perPage={perPage}
                handlePageChanged={this.handlePageChanged}
            />
        );
    }
};

export default App;
Then create a file Paginator.js to render a stub data:
import React from 'react';

const Paginator = () => (
    <div>
        {'1 2 3 4 5 [6] 7 8 ... 68 69'}
    </div>
);

export default Paginator;
After running yarn to install package dependencies and yarn start to run the project, we have a stub result:
1 2 3 4 5 [6] 7 8 ... 68 69
Calculate the values
Next step, we need to calculate all elements to render.
We assign a part of elements will fully display like this:
1 2 … 60 61 62 [63] 64 65 66 … 68 69
Including 3 pieces:
first => 1 2
slider => 60 61 62 [63] 64 65 66
last => 68 69
We continue to break down:
import _ from 'lodash';

// ...

makeUrlWindow() {
    return {
        first: [1, 2],
        slider: [60, 61, 62, 63, 64, 65, 66],
        last: [68, 69],
    };
}

elements() {
    const urlWindow = this.makeUrlWindow();

    return _.compact([
        urlWindow.first,
        Array.isArray(urlWindow.slider) ? '...' : null,
        urlWindow.slider,
        Array.isArray(urlWindow.last) ? '...' : null,
        urlWindow.last,
    ]);
}
Now we need to render slider part of the page link. Then, we calculate the total number of pages total và perPage:
lastPage() {
    const { total, perPage } = this.props;
    return Math.max(Math.ceil(total / perPage), 1);
}
If the total number of pages is not enough to slide, we put it back to a simple slider:
1 2 3 4 5 [6] 7 8
makeUrlWindow() {
    const lastPage = this.lastPage();

    // small slider
    if (lastPage < 12) {
        return {
            first: _.range(1, lastPage + 1),
            slider: null,
            last: null,
        };
    }

    // url slider
    // ...
}
If the current page is very close to the beginning of the page range, we will just render the beginning of the page range, followed by the last two of the links in this list, since we don’t have space to create a full slider.
1 2 3 4 5 [6] 7 8 ... 68 69
makeUrlWindow() {
    // ...

    // url slider
    const onBothSide = 6;

    const { currentPage } = this.props;

    // if slider too close to beginning
    if (currentPage <= onBothSide) {
        return {
            first: _.range(1, onBothSide + 3),
            slider: null,
            last: _.range(lastPage - 1, lastPage + 1),
        };
    }
}
If the current page is close to the ending of the page range we will just get this first couple pages, followed by a larger window of these ending pages since we’re too close to the end of the list to create a full-on slider.
1 2 ... 61 62 63 64 65 66 67 [68] 69
makeUrlWindow() {
    // ...

    // if slider too close to ending
    if (currentPage > lastPage - onBothSide) {
        return {
            first: _.range(1, 3),
            slider: null,
            last: _.range(lastPage - (onBothSide + 2), lastPage + 1),
        };
    }
}
If we have enough space on both sides of the current page to build a slider we will surround it with both the beginning and ending caps, with this window of pages in the middle providing a Google-style sliding paginator setup.
1 2 ... 60 61 62 [63] 64 65 66 ... 68 69
makeUrlWindow() {
    // ...

    // get full slider
    return {
        first: _.range(1, 3),
        slider: _.range(currentPage - 3, currentPage + 4),
        last: _.range(lastPage - 1, lastPage + 1),
    }
}
To display two links: Prev và Next, we need to d more calculation of these values,onFirstPagehasMorePage, prevPage, nextPage:
onFirstPage() {
    return this.props.currentPage <= 1;
}

hasMorePages() {
    return this.props.currentPage < this.lastPage();
}

previousPage() {
    const { currentPage } = this.props;
    return currentPage > 1 ? currentPage - 1 : 1;
}

nextPage() {
    const { currentPage } = this.props;
    const lastPage = this.lastPage();
    return lastPage > currentPage ? currentPage + 1 : lastPage; }
Render
Based on all the previous calculation, now we can render:
constructor(props) {
    super(props);
    this.onClick = this.onClick.bind(this);
}

onClick(page, e) {
    e.preventDefault();
    const { handlePageChanged } = this.props;
    handlePageChanged(page);
}

// ...

render() {
    const { currentPage } = this.props;

    const liStyle = {
        paddingLeft: '0.5rem',
        paddingRight: '0.5rem',
    };

    return (
        <ul style={{ listStyle: 'none', display: 'flex' }}>
            <li style={liStyle}>
                {
                    this.onFirstPage() ? (
                        <span>Prev</span>
                    ) : (
                        <a href="#" onClick={e => this.onClick(this.previousPage(), e)}>Prev</a>
                    )
                }
            </li>
            {this.elements().map((element, index) => {
                const Element = () => {
                    if (typeof element === 'string') {
                        return (
                            <li style={liStyle}>{element}</li>
                        );
                    }
                    if (Array.isArray(element)) {
                        return element.map((page) => {
                            if (page === currentPage) {
                                return <li style={liStyle} key={page}>{page}</li>;
                            }
                            return (
                                <li style={liStyle} key={page}>
                                    <a href="#" onClick={e => this.onClick(page, e)}>{page}</a>
                                </li>
                            );
                        });
                    }
                    return null;
                };
                return <Element key={index} />;
            })}
            <li style={liStyle}>
                {this.hasMorePages() ? (
                    <a href="#" onClick={e => this.onClick(this.nextPage(), e)}>Next</a>
                ) : (
                    <span>Next</span>
                )}
            </li>
        </ul>
    );
}
And we have the result as in this picture:

Creating a Component Paginator is pretty simple, huh? Leave a comment below or email us if you want to know more about the subject. Please make sure you share & subscribe if you find this post helpful. Good luck and have fun!
Cuong Giang